Sharing another oldie for IllustrationFriday's new prompt: Bouquet.This little lady is from a giveaway about 6 years ago. It is flat and doodly but still makes me smile. The flowers are in watercolor & the girl is from an Alice In Wonderland stamp by The Queen's Ink.
Pop over to IllustrationFriday.com to fill your day with flowers! And if you are feeling inspired, share your beautiful bouquet this week. Post it online and then share your link over at the IF site.
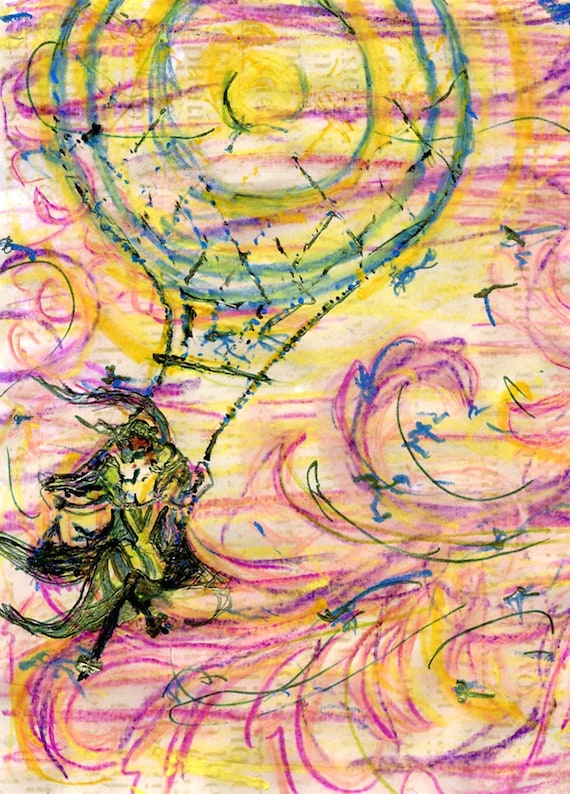
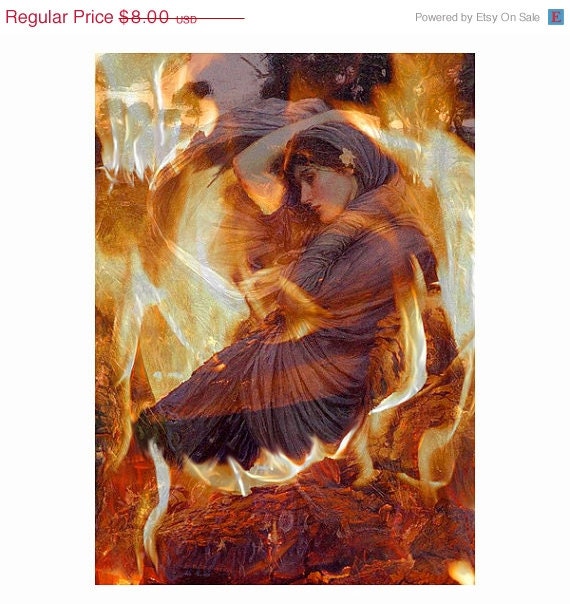
"Suddenly the wind ceased. The air seemed motionless around us. We were off..." - Alberto Santos-Dumont
I don't think she cares where she is going. This lovely lady is in it for the ride.
Loving the latest prompt from IllustrationFriday.com. This week is all about:
"Adventure"
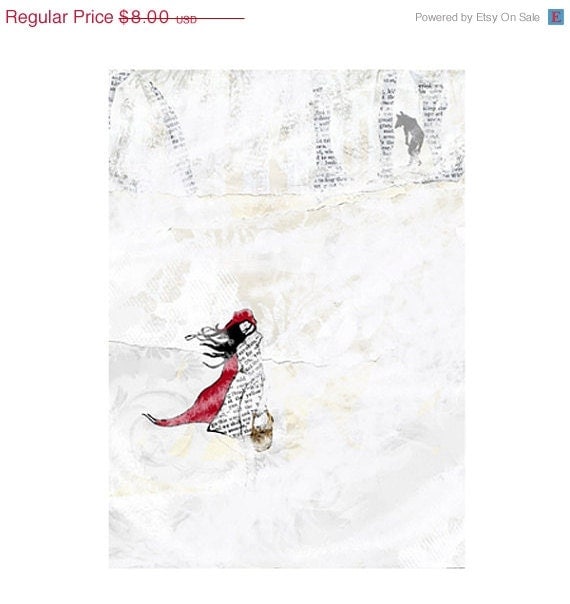
Here is a windy wanderer from a few years ago. She's been floating around in my Etsy shop, matted and ready to be popped into your 11" x 14" frame. She's also been marked down to $20, mat included - time to free up some inventory.
Do you have the heart of an explorer? Share your nomadic dreams today! Upload your take on adventure and add the link over at the Illustration Friday website.
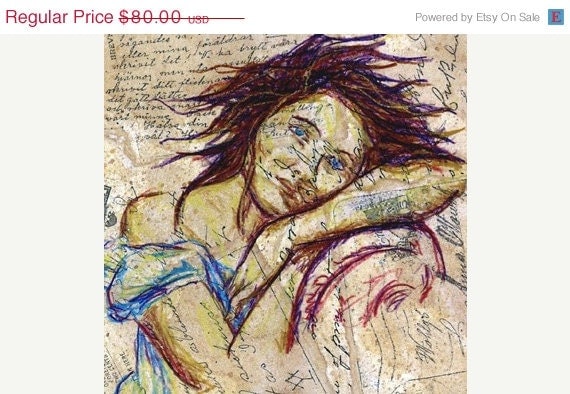
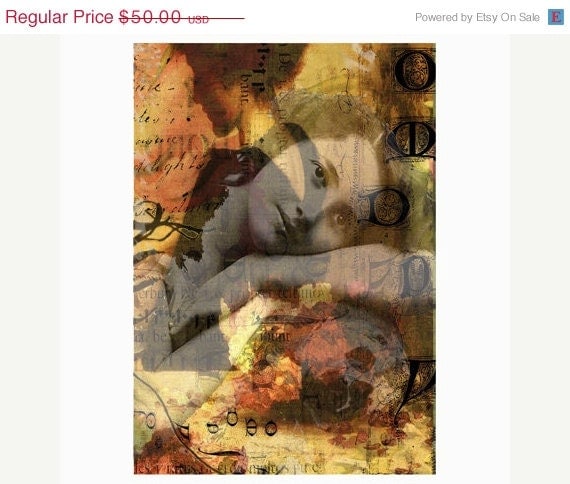
Exiled Princess? Retired villainess? Once famous for her wild parties, she now prefers to spend her time with butterflies and a bit of Nabokov.
Dusting off an ancient scribble for Illustration Friday's latest prompt: "Old". This butterfly collector is the third painting in the Rogues Gallery series. It is a mix of drawing & watercolor painting on patterned paper and measures 12"square.
Feeling inspired to share your golden oldies? Ready to check out creations based on the week's challenge? Pop by IllustrationFriday.com. The key word changes every Friday. Feel free to play along! Make something relevant and post it to your site or fave social media and then link up. If you do share, let me know. It is always fun to see where the latest prompt takes people.
Ready for a fast and fun DIY wall decor project? The generous folks over at Global Backyard Industries sent me a free 12 Piece DIY Decoupage Photo Kit to test out. I had a great time making this and am excited to share it with you today!
Disclaimer: I received this Decoupage Craft Kit in exchange for an honest & unbiased review. All opinions expressed here are my own.
This craft kit comes with six 4"x4" wood painting panels, two 4 oz. bottles of Mod Podge decoupage medium (1 mat, 1 glossy), 4 foam brushes, and a PDF with easy to follow project instructions. With 4 brushes this kit is also good for groups. Plus, wet Mod Podge cleans up easily with water so making this a perfect project to do with kids (or just someone messy, like me). When you are done you will have a cool gallery wall display.
You will also need your awesome photos, a ruler, a craft knife or scissors and a small cup to hold the Mod Podge you're using. I just trimmed down a giant plastic cup for easy clean up.
The square format of the panels is perfect for those instagram photos you are always wondering what to do with. Of course, any kind of photo can be trimmed to fit. I used some closeups of my roses.
Once your photos are 4" square, open up either either bottle of Mod Podge. First shake the bottle well, then remove the cap and pull off the protective foil. Replace the cap and pour a bit into your cup. Next:
Apply a light, even layer of Mod Podge (I went with the gloss finish) to the front of the wood panel using a foam brush (top left pic). Carefully place your photo on the wet panel. Don't worry if there is a little extra paper hanging over the edge of the wood. It will be easy to remove later.
Use a plastic card to lightly apply pressure to the photo. Gently drag over photo to remove possible air bubbles trapped underneath. Be careful not to tear your picture.
Let the photo panels dry at least 30 minutes. You do not want to apply your top coat over the photo until the adhesive layer is dry. Otherwise the image may wrinkle. In the meantime, rinse your brush with water or cover in plastic wrap, so it doesn't stiffen. Also cover any remaining decoupage medium in your cup so it does not dry out.
If needed, trim any extra photo sticking out. You may not need this step; I was a bit sloppy when cutting the original photo to size.
Once the adhesive is dry, add a top coat of Mod Podge. (bottom right pic in above photo). Use either Glossy or Matte (for a satin finish). Spread an even, light layer of Mod Podge over your photo, moving in one direction. This layer will look white at first but will dry clear. Please note, the PDF instructions mention that any brush strokes, dust, etc will show up in your final top coat. The top coat should be dry to the touch in about 30 minutes. The instructions state that it is best to leave it for 48-72 hours so there will not be a "sticky finish".
Here is a short video of this project. I'll thank you now for your patience. I managed to make a ton of technical errors. In fact, there are so many glitches that I considered bagging it. But then figured, ehh, what the heck.
Here are my final panels. I like the clean look and the depth of the panels. The surface is good as long as there is no glare.In a bright light or up close you can see brush strokes. I generally prefer a smooth finish. I have not used Mod Podge in at least 20+ years, so I am guessing it wasn't applied it correctly.
I may embellish these photos a bit, maybe follow the petals' edges with a non-water soluble marker or a little acrylic paint. Then do one more topcoat - this time with curling brushstrokes in different directions, following the flower's highlights and shadows. This might add an interesting painterly effect. I am also tempted to do play with the sides, maybe paint or add some text. But the clean look of the birch is nice too.
I really enjoyed this project. It takes your photo display to a new level, with the deep sided panels giving a professional look. This a great way to enjoy your pictures without having to get them framed or paying a lot for prints on gallery wrapped canvas.
The kit includes quality supplies. I am crazy about these birch & poplar panels! I'd like to order some more and draw and paint directly on them. They are very sturdy and have an attractive grain and smooth finish. The foam brushes are standard and do the job without falling apart. They also clean up easily. And the amount of Mod Podge supplied is much more than the project needs, so I have a lot left for future projects.
The only thing lacking in this bundle is perhaps some kind of hanging hardware. You can hang the open back directly on a nail, but I will feel more comfortable displaying them once I add some wire or a sawtooth hanger. Alternatively the sides are so thick that your photos can be displayed standing up on your mantle, desk or other surface.
So, where can you find this cool crafty kit?Click here to check it out on Amazon(This is not an affiliate link. I don't profit from items purchased)
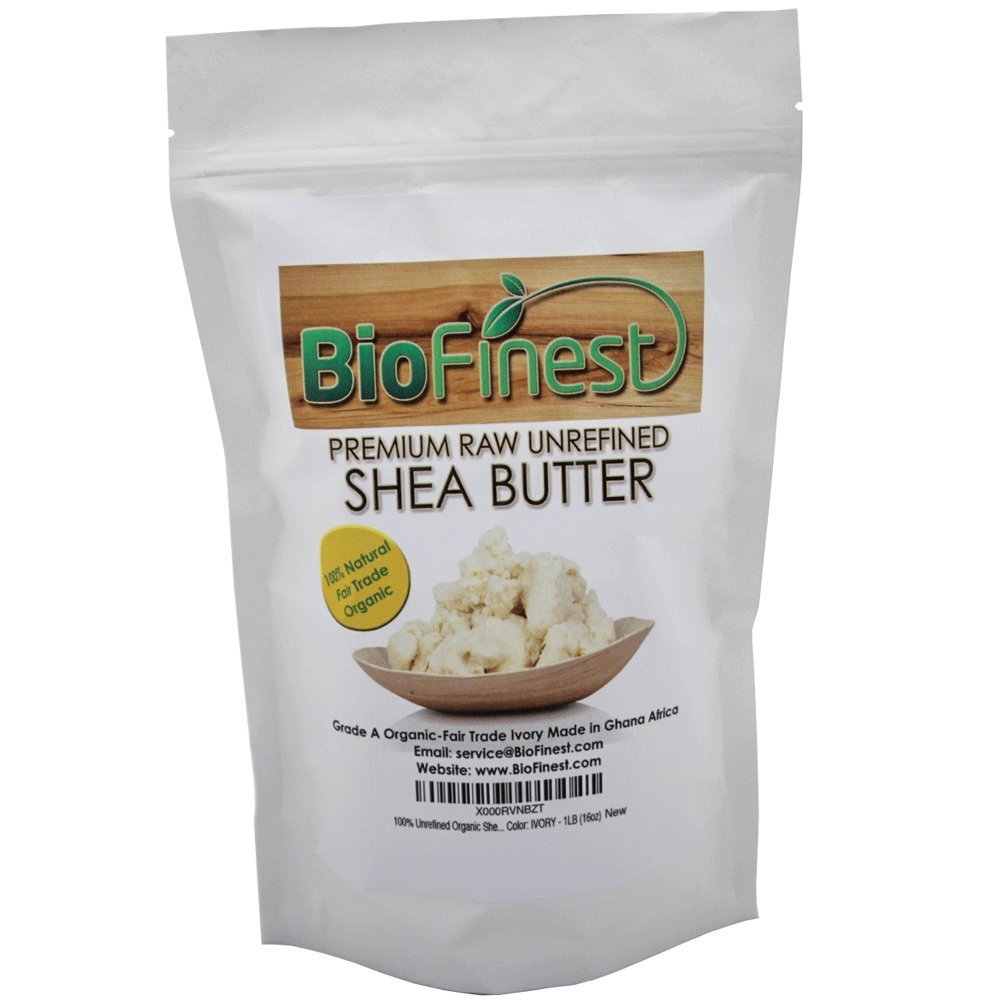
Promo image provided by BioFinest. Other photos were taken by me.
Today I made a glorious mess
and my skin feels fabulous!
I follow a few bath and body DIY craft sites and have been meaning to play around with Shea Butter for a while now. When the chance came up to try out Biofinest's Premium Raw Unrefined Shea Butter, I said "Heck Yeah!" and started scrolling through my bookmarks for an easy yummy online project.
Disclaimer: I received this package of BioFinest Premium Unrefined Shea Butter at a discount in exchange for an honest & unbiased review. All opinions expressed here are my own.
So, what is shea butter? It is a fat extracted fromthe shea tree nut through a fairly elaborate process. Wikipedia has an easy to follow synopsis here.
It has a number of applications, but the majority are cosmetic. Applied topically, it alleviates dryness. I find the silky feel lasts for hours - much longer than the average store bought lotion. Shea butter is full of Vitamins A & E, as well as antioxidants and fatty acids. Repeated use is is reported to help relieve eczema, psoriasis and other skin conditions.
It also is supposed to lessen wrinkles and stretch marks when applied regularly. When I was pregnant and gained about a million pounds, I was given a shea butter and herb cream to try and prevent stretch marks. I used it daily and don't know if it was the lotion or lucky genes, but something worked.
For the last few weeks, I've been rubbing straight shea butter on my perpetually cracked heels (always running around barefoot) and it is fantastic. Semi firm when you first break a piece off, it softens in your hand. It is very greasy when first applied, so I'll wait until I'm going to be off my feet for a while, rub it in and put on a pair of spa booties or old socks. You'll want to be sure to clean your hands before touching any papers or whatever.
Well, enough of my yaking. Let's get on with the project: This is what the shea butter looks like fresh out of the resealable package. It is double packed, which is a good thing as the inner bag was a bit slipper. Love that the outer sack has a zipper lock, as a little shea butter goes a long way.
If you purchase your shea butter from BioFinest, they will email you an e-book loaded with recipes and ideas. I managed to lose my email (note to self: contact them for a replacement) but found an impressive quantity of bath/body craft projects online. Many involve melting, mixing and cooling ingredients. I decide to start with something even easier. I found this DIY for Whipped Shea Butter Moisturizer on The Sparkle Collective. Monique makes it for her hair, but it works well as a skin cream too. Super simple sounding and I already had the other ingredients - perfect!
Following Monique's directions, 1 cup of shea butter goes into the bowl. It looks a lot like cow's butter but has a slightly firmer texture (at first). It kind of feels like creamy wax, if that makes any sense.
A quick twirl of the electric beaters on high. Then a couple of tablespoons each of jojoba and coconut oil were added, as directed. I ended up using 2 jojoba and 3 coconut. Things were getting pretty liquidy but a couple more minutes of whipping fluffed the concoction back up again. It had more of a white than yellow color at this point.
Then essential oils were added. I used lemon and lavender, mostly lemon. And more than the original project called for, since this unrefined shea butter has a distinctive scent that I don't really care for. I didn't really notice this when rubbing it on my feet, but the scent is a bit to strong for my arms or face. It is often described as nutty or smoky. I wouldn't say that. This is going to sound odd, but it reminds me a little of play dough. Please note, this is just my take on it. Many folks don't notice and even like the smell.
Here's the final body butter. The amazingly light and silky texture is fantastic! However, I couldn't get past the "undercurrent" shea butter smell. After tested it out on a couple of folks. I found someone who absolutely loves the scent and was happy to make her a gift of it.
The little tin is from Michaels Crafts and perfect for gift giving
This was a fun and fast project to make and the final feel of this lotion is absolutely luxurious. I will definitely try it again once I track down a more neutral scented shea butter. Wondering why I was able to use a similar product while pregnant without the aroma bothering me, I poked around and found this interesting and very thorough Guide to Different Shea Butters over at HumbleBee & Me. It looks like my nose might prefer a product that is more refined and neutral smelling. I'll have to track some down and let you know how it goes.
For more info about BioFinest Premium Raw Shea Butter, visit their website,Facebook and Amazon pages. They also have a 100% money back guarantee if you purchase from Amazon. (By the way this is not an affiliate link - I receive nothing from any purchases. )
Thanks for taking the time to check out this post. Are you into making your own bath and body products? Do you have any favorite ingredients or recipes? Have you ever used/worked with shea butter? I'm new to this type of crafting and am looking for any advice or suggestions.
Pop by later this week for a decoupage photo project and craft kit product revew. Here's wishing you a creative day!
Originally spotted this fun vintage tattoo style Alexander Henry fabric on Pinterest. A google image search eventually led me to best price for a few yards at etsy shop BrooklynDollFabric, my new go-to spot for textiles.
Now what to make? To be honest I seriously stink at sewing. Like, seriously seriously. Like Kryptonite seriously. So I'm leaning towards recovering the dining room chairs - a long overdue project and no sewing required. Any thoughts?
I'll give it a try in a week or two and share the process. If you are in the net neighborhood the next day or two, pop on by. My first attempts at making some shea butter bath/body projects will be on display.
Colorful salad made with spiral cukes, carrots, radish and more.
I love veggies!
And I love slicing veggie spirals! They are so much fun to eat and to make.
For the last couple of years I have been using another brand of spiral cutter. It is showing some wear, so I jumped at the chance to test out the WonderVeg Slicer Tri Blade Spiralizer. Disclaimer: I received this WonderVeg Slicer at a discount in exchange for an honest and unbiased review. All opinions expressed here are my own.
Freshly opened WonderVeg - woo hoo!
The WonderVeg's design is similar to other tabletop spiral cutting machines. Unlike my old machine, this one comes with a small bottle brush for cleaning. (The box also contains an instruction booklet which includes a few recipes to get you started.) One outstanding difference between this and my last machine is the size of the spikes which "grab" the produce and hold it still while you turn the crank. The WonderVeg slicer's prongs are significantly wider and sturdier. This is important for securing compact items like hard root vegetables. My last device had thin narrow spikes and I accidentally broke a few off the first time I made carrot "noodles". So far, there have been no problems attaching root veggies to this new machine.
English vs Regular Cucumber - see results below
So, how does it work? The base anchors to your work surface via suction cups. It also has a stabilizing handle which folds for storage. It has 3 easily changeable cutting blades. To use, install the blade you need in the upright slot. (The 2 not in use are stored at the base of the unit.)
Your fruit/veg to be spiralized will fit best if you slice the ends to flatten them; for very long veggies, cut in half crosswise, if needed. Center one flat end of your selected fruit/veg onto the metal circle sticking out of the blade. Center the other end on the spikes coming off the handle. Then you just press gently forward while turning the crank. Easy Peasy!
The photo above shows an English cucumber sliced 3 ways: Top Left uses the slicing blade for a fettuccine-like ribbon. Top Right uses the larger grate/slicer for a french fry/noodle cut. Bottom Left uses the smaller grating blade for a thin noodle; it is my fave, by the way.
The thinner "noodle" blade was also used on the Bottom Right cuke. However it is a "regular" cucumber, softer, with more seeds and a squishier center. It is possible to work with this type of cucumber, but it can be messy and sometimes you get something more resembling strips than thin spaghetti.
The video above shows how to change blades to create the different sizes. I also compare working with the two different types on cucumbers.
One unusual thing I did notice about the WonderVeg was that when the handle was within a few inches of the blade, sometimes the handle would shake a little bit. This did not happen every time, but it never happened with my older unit. The only problem with this is that the slight jiggling cut small items, like the radish above, into individual rings instead of a longer spiral. Without the wiggle room, my older machine would make a long spiral of each radish. Totally not a big deal, but after reading that an amazon reviewer had the same thing happen I thought I should point it out.
Same spiral cut veggies as top salad - this time with an Asian twist.
The WonderVeg is super easy to disassemble and clean. Leftover bits of produce are easily washed off by hand or you can put all of the slicer's pieces into the top rack of your dishwasher.
zuchinni noodles tossed with wilted spinach,shallot,artichoke hearts,olives, red pepper and cheese
Several meals a week feature tasty twisted produce at my house. There are so many fun-filled, yet healthy, ways to serve them. My husband loves spiraled vegetables in salad and soups (try adding cut zucchinni or broccoli stems to chicken or vegetable soup), the kiddo is crazy about oven-baked curly fries, which he customizes with his favorite-spice-of-the-day. And I will pretty much eat them with everything. The WonderVeg also makes fast work of slicing a mound onions, perfect for folks (like me) who tear up when chopping with a knife "old school" style
Play around and find your family's favorites. Since it is so simple to change out the blades, you can easily tweak everyone's dish using the same ingredients for a unified meal. I like my zucchinni "pasta" sliced on the smallest blade and served raw with whatever sauce or veggies/protein mixed in. My family prefers the same sauces served over zukes that are first cut with the larger "pasta" blade and then saute'd for 2-3 minutes in olive oil.
Spiral veggies are all the rage right now; there have to be thousands of free recipes online. I have collected 100+ (and counting) that sound intriguing on a special pinterest board. Click here to check it out. Have you tried any of the veggie "rices" or sandwich buns made from compressed and cooked veg noodles yet? Those are definitely on my To Do list!
As far as old school cookbooks go, I've looked through a few and my favorite is Ali, Maffucci's Inspiralized. She also has tons of spiral slicer recipes on her food blog.
I can't believe it is already time for kids to return to school. I don't know about you, but I am not a morning person. (Or a fan of the alarm clock.) Once I get moving, it is okay though... and sometimes the morning walk to school and back is the best part of my day.
I do not like to carry a bag on this walk and some days I am stumbling out the door in sweatpants, instead of an outfit with pockets. I've been meaning to order an armband or other no-fuss system to carry my phone, house key (and maybe a credit card or a few bucks as I pass the grocery store on the way home). When the opportunity came up to check out this iphone 5 armband from Airbundle, I was psyched. Disclaimer: I received this iphone armband in exchange for an honest & unbiased review. All opinions expressed here are my own.
There is a wide velcro closure for securing the band to your forearm/bicep. It is not huge, so maybe not for bodybuilder types. Good for the average person, though. My iphone 5 slips easily into the slot on the backside of the armband.
There are also slots for a key, a plastic card, cash and headphones. By the way, my house key has an oversized top; an average size key shouldn't stick out quite as much.
The reflective frame is a safety bonus on those winter mornings when it is still dark as we head off to school,
The clear plastic front is flexible and adds some weather protection, while still allowing me to access the phone's screen.
While headphones do plug in easily, I love my wireless headphones and find this to be a very comfortable and convenient combination!
Pros and Cons Quick List:
Good for iphone 5/5s/5c, 4/4s and ipod touch 5th gen. My 5s had to be inserted without a case in order to fit.
Secure storage for key, card and cash - yet easy to remove items when needed.
Comfortable and flexible armband will fit many builds,but probably not large biceps. The manufacturer states that it fits arm sizes that are approximately 9" - 15" inches.
Made of nylon, velcro and nyoprene, this case offers your phone some protection from elements and can be hand washed and air dried if needed. I don't know how well it would keep out heavy precipitation though.
It is priced reasonably. Today this armband is on sale for $7.99 on Amazon, with free Amazon Prime shipping available. Click here to check it out! (This is not an affiliate link; I don't receive any compensation for purchases).
Seems like forever since I played along with XmasDolly's Monday Music Moves Me. I popped over to StacyUncorked when I had a minute, found out that today is the 5 year anniversary of this fun tune-filled blog hop and had to jump on the bandwagon.
Today's theme is a freebie, so here is what has been playing in my house this week. The Dude (now that he is going into jr high I'm not supposed to call him "Little Dude" anymore; mind you he is almost as tall as I am, so I get it) discovered Cole Porter through one of his post apocalyptic video games and was pleasantly surprised to find that his old Mom has a ton of "old people music" (his words, not mine) on these ancient things called CDs. He was even happier to find that the Amazon Prime music library has a ton of free Cole Porter, covered by just about everyone.
The thing about Mr. Porter, he seriously gets under the skin. Listen to Anything Goes a few times and you WILL be humming it. Nothing like the classics.
To counteract the earworms (& simply because I'm hooked) I've been listening to the prereleased tracks of Mykur's album coming out August 21. Not everyone's cup of tea, but I'm liking it much more than I expected. You can catch it early on Youtube (among other places).
I've read that she's coming from a pop music background. Quite a change. Here's a short where she talks about her music a bit:
So, what are you listening to lately? Please share. Join in the fun - looks like there are even giveaways this week, for some extra celebrations!
---------------Side Note--------------
If you pop by here now and then, you may notice that I've been crazy inconsistent with blogging for a while. (For consistency and content, you'll want to time machine back a few years.) Now-a-days I'll chatter away in my nut... but then the clock ticks faster than expected... and life-stuff beckons. (How many cliche's can you lick before getting to the center?) The plan was to share 2 tutorials last week and a review....but life happened. I addition to the usual distractions, I'm consulting on an unexpected project that dropped into my lap. It is all very hush hush for a couple of months, but is super cool, out of my comfort zone... and I can't wait to share eventually!
That said, I probably won't be around this week but will return with those reviews and projects, as well as random thoughts (& tunes) before the month ends. It is also our 23rd wedding anniversary, so the family is hitting the road for a few days of fun before the school year starts again.
Hope you have a wonderful week and a creative day! And be sure to check out theMusic Monday blog hop. Never know, you might be one of the lucky winners.
Many pieces are already matted. Some are framed and ready to hang! You will find details in each item's description. Feel free to contact me with any questions.
Disclaimer: I received a copy of this book in exchange for an honest review. Opinions expressed here are my own.
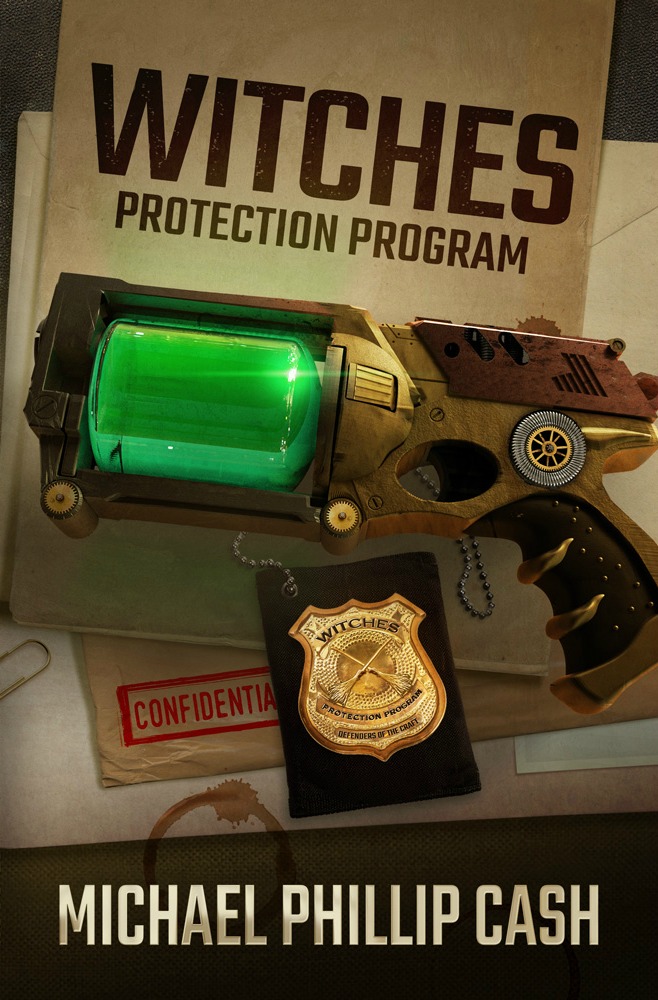
While a fan of the supernatural, I've always been more of a monster kind of gal - not so much into the witchy- thing... until recently. Last spring I finally got around to watching Season 1 of Salem while playing with a few enchantress canvases and went off on a full blown sorceress-binge. Several books and movies later I came across Michael Phillip Cash's short novel, Witches Protection Program. I loved the silly title with its Mike Hammer meets Men In Black kind of vibe. The promo summary had a fun feel too:
"Wes Rockville, a disgraced law enforcement agent, is given one last chance to prove himself and save his career when he's reassigned to a 232 year old secret government organization. The Witches Protection Program. His first assignment: uncover a billion-dollar Cosmetics company’s diabolical plan of using witchcraft for global domination, while protecting its heiress Morgan Pendragon from her aunt’s evil deeds. Reluctantly paired with veteran witch protector, Alastair Verne, Wes must learn to believe in both witches and himself. Filled with adventure, suspense and a rousing good time, Michael Phillip Cash creates a tongue-in-cheek alternate reality where witches cast spells and wreak havoc in modern day New York City."
And the youtube trailer has cheesy-beach-read all over it, just right for a sleepy sunburned(out) brain:
I really wanted to like this book but just couldn't get into it, even with tongue firmly placed in cheek. While a quick read, it never quite grabbed me. I'd pick up a few pages, only to set it aside with every little distraction. The author's writing style, dialog and characters remind me of the hard boiled detective stories and pulp magazines I enjoyed as a kid. However the cliche's, at first amusing, became tiresome and I lost interest half way though. I think this book is good for a certain type of reader, maybe just not me.
My copy of WPP came with some fun witchy swag, immediately claimed by the kiddo.
Witches Protection Program seems well suited for a quick interlude, say a plane ride or bout of insomnia. My husband took it on a trip before I finished, so I purchased the audiobook version of WPP on Audible.com to finish. Dan McGowan's stilted narration is well suited to the pulpy prose style and I found the story made excellent background entertainment. It didn't have enough to hold my full attention, but was amusing enough to entertain me while doing chores. While I will not be seeking out any of the author's other books, I 'd still give Witches Protection Program 3 stars (out of 5) as it seems a good example of its genre.
This is where you can get a peek at my latest creations. I also tend to ramble about favorite artists, curious objects, local events & other obsessions. Hope you enjoy your look around. All questions & comments welcome.