Hey there! Long time, no see. How have you all been? I hope you are off to a promising 2016!
Life has been in a kind of stasis for a while, which has been reaaally boring, so I'm jumping on the New Year/New You bandwagon. There's always room for 1 more, right? Tackling overdue projects, loads of decluttering and returning to pleasures missed are on the top of January's (& probably Feb/March's) to-do list. Plus this lonely blog has been calling to me for a while. It's good to be back!
Reflecting on the past year, I missed too many simple moments. I forgot to find joy in the littlest things. Basically I spent a lot of 2015 stuck in my head. When this happened a couple of years ago, I shook out the cobwebs by capturing them (& other natural wonders) in a fun 365 Days in a Gardeninstagram project. The series started as a whim, but I ended the year with increased awareness of my surroundings and learned to find something magical in every day.
I don't know about you, but I am overdue for a little magic. My new phone came in tonight (yeah)! The camera in my last one has been faulty forever. Even thinking of taking pics was depressing as, they would almost always come out blurry and poorly lit. Now that I have my new lifeline, I'm thinking about starting up another 365 days in photos gig.
Any thoughts? Gardens again? Or general eye candy?
Care to join me? Could be fun. When you REALLY open your eyes, you might be surprised by what is right in front of you!
Sharing another oldie for IllustrationFriday's new prompt: Bouquet.This little lady is from a giveaway about 6 years ago. It is flat and doodly but still makes me smile. The flowers are in watercolor & the girl is from an Alice In Wonderland stamp by The Queen's Ink.
Pop over to IllustrationFriday.com to fill your day with flowers! And if you are feeling inspired, share your beautiful bouquet this week. Post it online and then share your link over at the IF site.
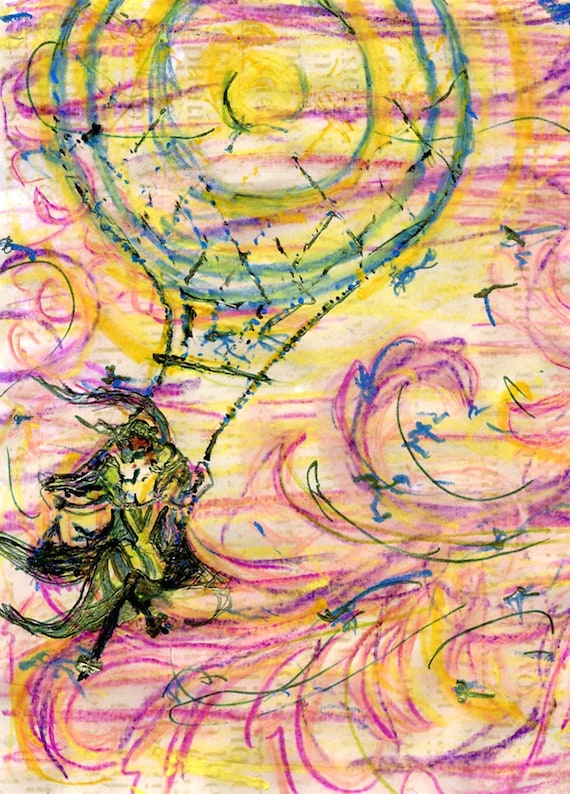
"Suddenly the wind ceased. The air seemed motionless around us. We were off..." - Alberto Santos-Dumont
I don't think she cares where she is going. This lovely lady is in it for the ride.
Loving the latest prompt from IllustrationFriday.com. This week is all about:
"Adventure"
Here is a windy wanderer from a few years ago. She's been floating around in my Etsy shop, matted and ready to be popped into your 11" x 14" frame. She's also been marked down to $20, mat included - time to free up some inventory.
Do you have the heart of an explorer? Share your nomadic dreams today! Upload your take on adventure and add the link over at the Illustration Friday website.
Exiled Princess? Retired villainess? Once famous for her wild parties, she now prefers to spend her time with butterflies and a bit of Nabokov.
Dusting off an ancient scribble for Illustration Friday's latest prompt: "Old". This butterfly collector is the third painting in the Rogues Gallery series. It is a mix of drawing & watercolor painting on patterned paper and measures 12"square.
Feeling inspired to share your golden oldies? Ready to check out creations based on the week's challenge? Pop by IllustrationFriday.com. The key word changes every Friday. Feel free to play along! Make something relevant and post it to your site or fave social media and then link up. If you do share, let me know. It is always fun to see where the latest prompt takes people.
Ready for a fast and fun DIY wall decor project? The generous folks over at Global Backyard Industries sent me a free 12 Piece DIY Decoupage Photo Kit to test out. I had a great time making this and am excited to share it with you today!
Disclaimer: I received this Decoupage Craft Kit in exchange for an honest & unbiased review. All opinions expressed here are my own.
This craft kit comes with six 4"x4" wood painting panels, two 4 oz. bottles of Mod Podge decoupage medium (1 mat, 1 glossy), 4 foam brushes, and a PDF with easy to follow project instructions. With 4 brushes this kit is also good for groups. Plus, wet Mod Podge cleans up easily with water so making this a perfect project to do with kids (or just someone messy, like me). When you are done you will have a cool gallery wall display.
You will also need your awesome photos, a ruler, a craft knife or scissors and a small cup to hold the Mod Podge you're using. I just trimmed down a giant plastic cup for easy clean up.
The square format of the panels is perfect for those instagram photos you are always wondering what to do with. Of course, any kind of photo can be trimmed to fit. I used some closeups of my roses.
Once your photos are 4" square, open up either either bottle of Mod Podge. First shake the bottle well, then remove the cap and pull off the protective foil. Replace the cap and pour a bit into your cup. Next:
Apply a light, even layer of Mod Podge (I went with the gloss finish) to the front of the wood panel using a foam brush (top left pic). Carefully place your photo on the wet panel. Don't worry if there is a little extra paper hanging over the edge of the wood. It will be easy to remove later.
Use a plastic card to lightly apply pressure to the photo. Gently drag over photo to remove possible air bubbles trapped underneath. Be careful not to tear your picture.
Let the photo panels dry at least 30 minutes. You do not want to apply your top coat over the photo until the adhesive layer is dry. Otherwise the image may wrinkle. In the meantime, rinse your brush with water or cover in plastic wrap, so it doesn't stiffen. Also cover any remaining decoupage medium in your cup so it does not dry out.
If needed, trim any extra photo sticking out. You may not need this step; I was a bit sloppy when cutting the original photo to size.
Once the adhesive is dry, add a top coat of Mod Podge. (bottom right pic in above photo). Use either Glossy or Matte (for a satin finish). Spread an even, light layer of Mod Podge over your photo, moving in one direction. This layer will look white at first but will dry clear. Please note, the PDF instructions mention that any brush strokes, dust, etc will show up in your final top coat. The top coat should be dry to the touch in about 30 minutes. The instructions state that it is best to leave it for 48-72 hours so there will not be a "sticky finish".
Here is a short video of this project. I'll thank you now for your patience. I managed to make a ton of technical errors. In fact, there are so many glitches that I considered bagging it. But then figured, ehh, what the heck.
Here are my final panels. I like the clean look and the depth of the panels. The surface is good as long as there is no glare.In a bright light or up close you can see brush strokes. I generally prefer a smooth finish. I have not used Mod Podge in at least 20+ years, so I am guessing it wasn't applied it correctly.
I may embellish these photos a bit, maybe follow the petals' edges with a non-water soluble marker or a little acrylic paint. Then do one more topcoat - this time with curling brushstrokes in different directions, following the flower's highlights and shadows. This might add an interesting painterly effect. I am also tempted to do play with the sides, maybe paint or add some text. But the clean look of the birch is nice too.
I really enjoyed this project. It takes your photo display to a new level, with the deep sided panels giving a professional look. This a great way to enjoy your pictures without having to get them framed or paying a lot for prints on gallery wrapped canvas.
The kit includes quality supplies. I am crazy about these birch & poplar panels! I'd like to order some more and draw and paint directly on them. They are very sturdy and have an attractive grain and smooth finish. The foam brushes are standard and do the job without falling apart. They also clean up easily. And the amount of Mod Podge supplied is much more than the project needs, so I have a lot left for future projects.
The only thing lacking in this bundle is perhaps some kind of hanging hardware. You can hang the open back directly on a nail, but I will feel more comfortable displaying them once I add some wire or a sawtooth hanger. Alternatively the sides are so thick that your photos can be displayed standing up on your mantle, desk or other surface.
So, where can you find this cool crafty kit?Click here to check it out on Amazon(This is not an affiliate link. I don't profit from items purchased)
This is where you can get a peek at my latest creations. I also tend to ramble about favorite artists, curious objects, local events & other obsessions. Hope you enjoy your look around. All questions & comments welcome.