Chocolate... Vanilla... Minifigures!
Yes, Yes and Yes!
When the opportunity to check out Cornucopia Brands Lego-inspired minifigure ice cube mold popped up my first thought was ..... Caaaandy! (Insert sing-song voice here.) Disclaimer: I received 2 of these silicon ice cube trays for free in exchange for an honest & unbiased review. All opinions expressed here are my own.
Here the molds are washed, dried and ready to rock and roll. At this point I was still more excited than my Lego-loving kid. (Caaaandy!)
We tried them first as ice cube trays. Due to the small size they froze up quickly and but also melted quickly and were a little bit anticlimactic. (Caaaandy!) I think they would have been more impressive I'd either made them out of, or put them into, a brightly colored liquid like Kool-aid or juice.
But wait! Did someone say CAAAANDY?
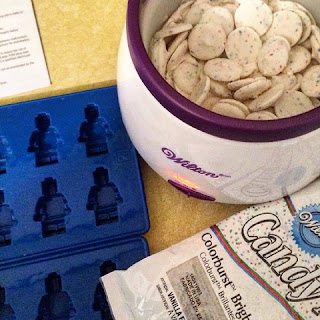
First we warmed up some Wilton Vanilla Colorburst Candy Melts. You can melt these on the stove or microwave using the directions on the melts' package. I used my Wilton chocolate melting pot. This is one of my favorite kitchen toys; it always gives a super fast/never fail melting experience.
Piping the liquefied candy would have made less mess, but fast and sloppy worked too. When pouring melted candy wafers (and chocolate) bubbles tend to form. As soon as you've added the melted candy to the mold, drag a toothpick through the smaller bits to make sure it goes in those hard to reach spots. Also, tap the mold a few times on the counter and other bubbles will rise to the top. Add more candy if needed. You will want the back as level as possible, since you will need to trim off the overflow; see figure above.
The filled trays went into the refrigerator about 10 minutes, until the candy hardened again (and I cleaned up my mess). The flexible trays made it very easy to pop the little men from the molds. In the photo below you can see gaps where bubbles were (I forgot to tap the first tray on the counter to release them). If needed, you can fill these holes by adding a dot of melted candy and smoothing over.
Here I'm playing with some edible ink markers to make my minifig look more Lego-like. I wish I had known about these molds and markers when my son was younger - these little guys would have been a big hit on top of classroom and birthday cupcakes once upon a time.
Now onto the really good stuff! 1 1/2 bars of Lindt A Touch of Sea Salt Dark Chocolate were broken into the freshly cleaned melting pot. A few minutes melting and occasional stirring and we were ready to go.
The minifigure molds were again filled and refrigerated. The chocolate takes a few more minutes to set up than the melts, and it is a bit softer to work with. The little guys then popped right out.
And devoured soon after.
The next day, there are only a handful of these left and the family is already asking for more. My son said "This chocolate is good, but I can't believe how much better it tastes shaped like a Lego man!" before decapitating the minifig in his hand.
I've pinned some colorful candy recipes to try soon, including some for hard candy (without corn syrup) & minifigure gummies. (Once again) if my son was younger, I would also have made some crayon figures too.
I would definitely recommend these flexible molds to anyone who enjoys an easy DIY project. They are super easy to work with and clean. And whatever you make will make your Lego fan smile.
You can find these silicon molds on Amazon.com. You can also find out more about Cornucopia Brands and their product catalog on their website.


"This chocolate is good, but I can't believe how much better it tastes shaped like a Lego man!"
ReplyDeleteThat's awesome. I feel like I need some of these...
You do! I, I mean, the kiddo can't wait to try making the gummy jello guys
Delete